Thanksgiving Guide Part III: Sweet Endings

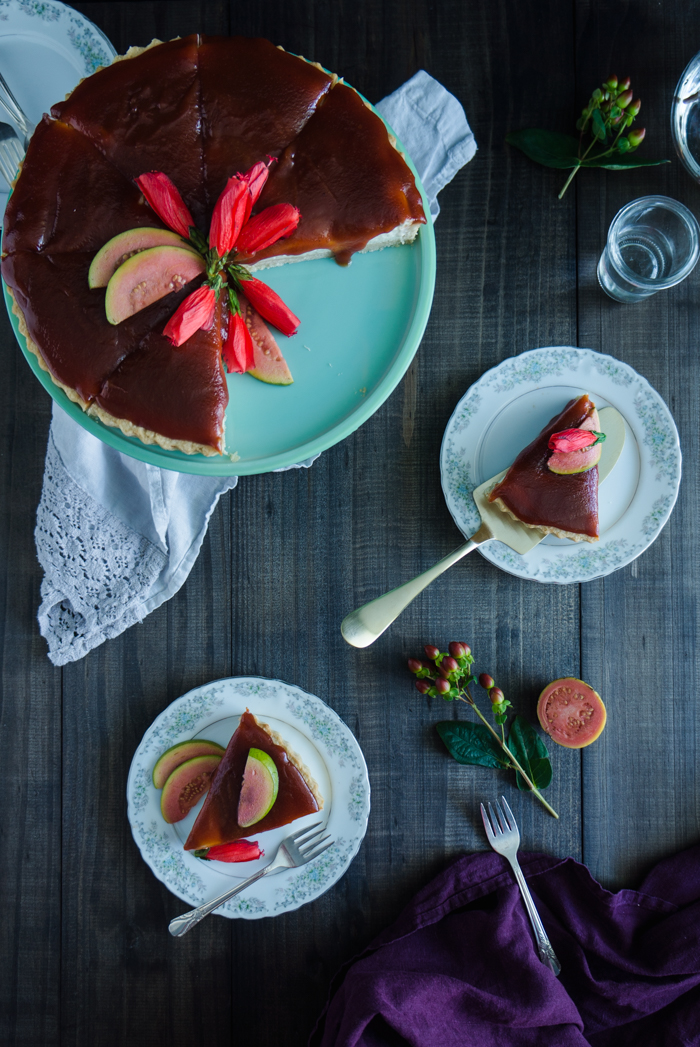
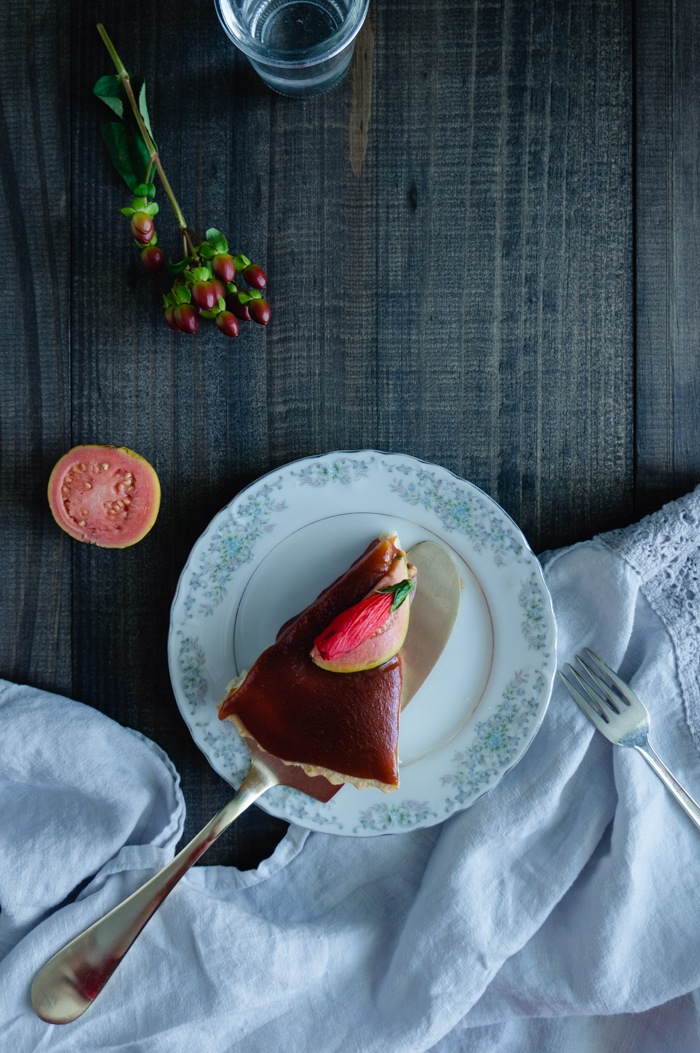
Guava and Cheese Tart
Many memories jump out of my memories’ treasure box when I think about the original version of this dessert, mainly because it was the go to sweet recipe on every holiday we celebrated in our home. In particular I remember my sister and I having a taste of karma on a given Thanksgiving evening, when all our family were at the table waiting for our mom’s cheesecake after a lovely and delicious Thanksgiving lunch.

For that day my mother would make two cheesecakes because we will definitely eat one whole and half of the other. When we went to the kitchen to pick up the first pie we noticed that one was firmer and the other a bit runny. This cheesecake, even in its simplicity, is so good that we would do anything to have the best piece. We looked at each other and you could tell by our puzzled eyes that we thought the same thing, bring to the table the softer one so then, at night, we would throw ourselves on the couch and have a piece of the good stuff while watching TV after hours of cleaning dishes. In our excitement of being kind of bad girls, mischievously laughing for being so clever with our intentions, we anxiously reached for the tray of the softer one at the same time, hands and fingers crossing to each other. Needless to say, the tray ended up on the floor, all the filling basically spreaded around our feet. We laughed at the irony of the situation and, after cleaning up the mess, we brought to the table the perfect one. Our misfortune turned out to be great for our guests. It was though a good adventure for a teen and tween learning the rules of the karma law!


Back at those times the recipe was extremely simple; just mix cream cheese, condensed milk and lemon juice in a blender, pour them in a store bought graham cracker crust (that is why we called it a cheesecake) and chill for a couple of hours. Some years after, though, my sister and I have evolved our beloved dessert with new ingredients and different techniques. She started playing around with the toppings and whipping the filling instead of blending. I started experimenting with new flavors within the filling and using different kind of cookies for making the crust. Every time we ended up with a new flavor experience that in essence was old and known for us.
For the third part of this Thanksgiving guide it was so obvious that I would share this recipe with all of you. It’s extremely simple and truly delicious. I wanted to bring to the table a combination of flavors that are quintessential in the Puerto Rican sweets repertoire: cheese and guava. Even if the tradition only started as Puerto Rican white cheese with guava paste pieces on top, it has translated into many type of desserts, for which is better to use cream cheese instead for its creamy consistency, therefore the idea of bringing a guava glaze on top of my cream cheese dessert. For the crust I decided to make a pastry dough tart shell to make it a simple but elegant dessert for our Thanksgiving table. You will see I made lots of explanations, in case you don’t have much experience doing this kind of pastry, but is really easy and, besides the chilling times, really fast.
Wish you guys a great Thanksgiving, were you have the opportunity to cherish all the blessing in your life with the ones you love!!
Recipe notes:
1. You could make the whole tart with two days in advance. I highly recommended that you make it at least one day before, especially if you are going to be doing other dishes on Thanksgiving Day.
2. Take your time to make the tart. Read the recipe carefully so you can have everything prepared and organized with the order of procedures and waiting times.
3. You may use you favorite pastry dough recipe or even the classic graham cracker crust if you prefer, but this tart recipe is really good.
Cheese and Guava Tart
Total time - 3 hours, dividedActive time - 30 to 40 minutes
Equipment - 9 inches flute pan, stand up or electric hand mixer, parchment paper the size of the bottom of the pan, pie weight or beans
Tart Shell
Unbleached flour – 2 cups
Unsalted butter – 9 TBSP, cut in small pieces and chilled
Egg yolks – 2
Raw sugar – ⅔ cup
Vanilla paste – 1 Tsp
Fine sea salt – 1 Tsp
Ice cold water – 5 TBSP
In a medium bowl combine the flour, sugar and salt and mix them well using a hand whisker. Add the butter and work the ingredients by rubbing them with your fingers until completely combined. Make sure you continually fluff the mixture to incorporate lots of air, until the mixture starts to resemble fine breadcrumbs and then starts to clump together. Using a small spatula and with your hands mix thoroughly the egg yolks into the mixture.
(Alternatively, you could mix the dry ingredients in a large food processor, then add the pieces of chilled butter and pulse until you get the consistency of fine breadcrumbs. Transfer to a bowl or directly to a floured flat work surface to add the eggs.)
Using your hands knead gently, adding 1 tablespoon of the ice cold water one by one until you form a soft dough. Add no more than 5 tablespoons.
Transfer to a floured flat work surface and work the dough to form a disk. The key here is to flatten the dough as much as possible with your hands. Cover in plastic wrap paper and chill for at least 30 minutes on the refrigerator. You may also prepare in advance and freeze it to use days later.
Lightly sprinkle a rolling pin with flour and over a floured flat surface stretch the dough to flatten it out to form a disk large enough to fill your tart pan and is about ⅙ thick. Do not roll back and forth and left to right. Always roll one direction vertical and one direction horizontal, making sure the dough is not breaking too much. If it breaks a little bit you could tear a small piece from the edges and use as a patch to repair it.
Wrap the pastry around the rolling pin and then unfold it over the tart pan, making sure it is centered. Using your fist gently push through the center and around the edges so the dough takes the form of the pan. With a pairing knife cut the excess of dough sharply through the edge of the pan. Fold or form a small disk with the excess, cover in plastic paper and place in a freezer plastic bag to store in the freezer for future use in another recipe. Prick the bottom across with a fork. Chill again for about two hours to prevent shrinkage while baking.
Preheat oven to 350°.
After the two hours remove from the fridge. Cover the bottom of the pan with the parchment paper and fill with pie weights or beans. Blind bake for 10 minutes. Take out from the oven and (carefully and patiently) remove the parchment paper and pie weights or beans. Put back and bake for another 10 minutes. If you prefer a golden and harder shell, bring the oven to 375° for the last 5 to 7 minutes. Retire from oven and let it cool completely before filling it.
Cheese filling
Regular cream cheese, slightly softened – 16 ounces, 2 boxes
Condensed milk – 14 oz
Freshly squeezed lemon juice – 2 TBSP
Vanilla paste – 1 Tsp
In the bowl of a stand up mixer with the whisk attachment mix all the ingredients, 5 minutes in speed 4 or medium speed and 1 minute in speed 6 or medium high speed, to incorporate more air and yield a fluffier filling. Pour inside the tart shell.
Guava glaze
Guava paste, cubed – 12 oz (approximately 1+ cup of cubed guava paste)
Water - ⅓ cup
Unsalted butter – 2 TBSP
In a small saucepan combine all the ingredients and cook in moderate heat, using the help of a hand whisker to break down the pieces of the guava paste. Cook for 5 to 7 minutes, until the paste pieces are completely melted and the glaze looks shiny. Remove from heat and wait a minute before pouring the glaze across the cheese filling. Let it cool down a bit before covering with plastic paper and put it in the fridge. Chill for at least 4 hours in the fridge or overnight. Alternatively you may chill in the freezer for 1 hour and then continue chilling in the fridge for an extra 2 hours. Serve with fresh fruits, nuts or whipped cream or, as I did, some edible flowers.
