Nutella Heart Shaped Cookies


I actually did it!! A batch of Nutella sugar cookies that actually made their way to the blog! This combination is so loved over my IG feed, but for some reason I have never posted the actual recipe here. How could I’ve done that?? But now you’ll have the chance to make this easy sugar cookies recipe and discover my tricks on how to make sugar cookies taste better and my foolproof method of baking them without spreading on the oven. Get ready for some cookie galore!
I shared this recipe and all my tricks on my cookie workshop last month and everyone agreed that the cool thing about this basic sugar cookie recipe is its adaptability. You can make them from thin and crispy to soft and chewy, depending on how thin or thick you stretch the dough and how much time they are in the oven. And make them taste better than any other sugar cookie by adding orange or lemon zest for a nice floral note, the classic vanilla or almond extract or lemon, orange or coconut extract and pick a complimentary filling to create a delicious custom creation!
My secret ingredient though is a bit of ground nutmeg. Even if these aren’t spiced cookies, I have discovered that nutmeg brings all the flavors home and balance all the sweetness. You can actually see the speckles of nutmeg in the dough. You have to try this trick and let me know how it goes!
I paired the Nutella filling with some hibiscus glaze, which you know is a favorite around here. I just mixed some hibiscus brewed tea with confectioner’s sugar. You control the saturation by how much tea you add. The key for making glazes that dry up stiff and smooth with a matte finish is to only use water based liquids, like I did here. Do not add any creamy based liquid fats like milk, heavy cream or coconut milk or fat based spreads like cream cheese, Nutella or peanut butter. Don’t add either sugary liquids such as maple syrup, honey or jelly because the glaze won't dry up enough to end up like a hard shell.
And how to prevent sugar cookies from breaking when trying to transfer them to a baking sheet or from spreading in the oven? My trick is to freeze the cut dough, then separating everything like if you were disassembling a puzzle and baking the cookies frozen. The trick never fails!! Even when you feel the dough is a bit brittle or soft, this step is crucial. And it’s actually pretty fun!
How to make these Heart Shaped Nutella Sugar Cookies
It will be a good idea to put everything in place. Serve your ingredients, remembering that the butter needs to be softened, so you may start by taking it out of the fridge. Have accesible your cookie cutters, take your baking sheets and cooling racks out and make some space in the freezer for your baking sheet or at least a piece of parchment paper.
The butter needs to be soft but not super soft or warm because it needs to keep it’s texture as much as possible during the mixing process.
I used some almond flour in here to make the cookies more tender and light. You may use just unbleached all-purpose flour if you don’t have almond flour on hand. Just use 3 cups of flour and omit the extra two tablespoons that you will see listed in the ingredients list.
Beat the butter with the sugar and zest to infuse the zest into the butter for more flavor (another trick!) and then add the egg and extracts, according to recipe. Add your dry ingredients and mix until creamy but still grainy.
You’ll divide that dough in half and work it directly on the parchment paper, including stretching it between two parchments with a rolling pin. This is to prevent the dough from crumbling.
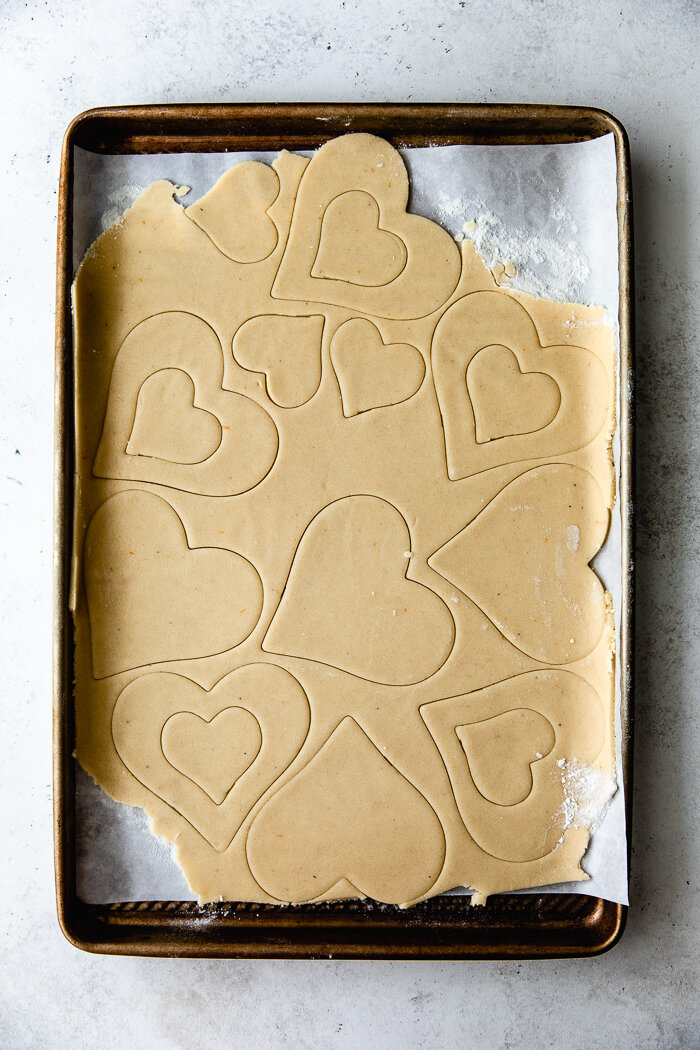
Here’s the key! You will transfer carefully that parchment paper to the baking tray and there your will cut your dough with the cookie cutters. If the dough breaks a little when transferring, just press it back together with your fingers, like working with clay. This tray will go to the freezer as it is.
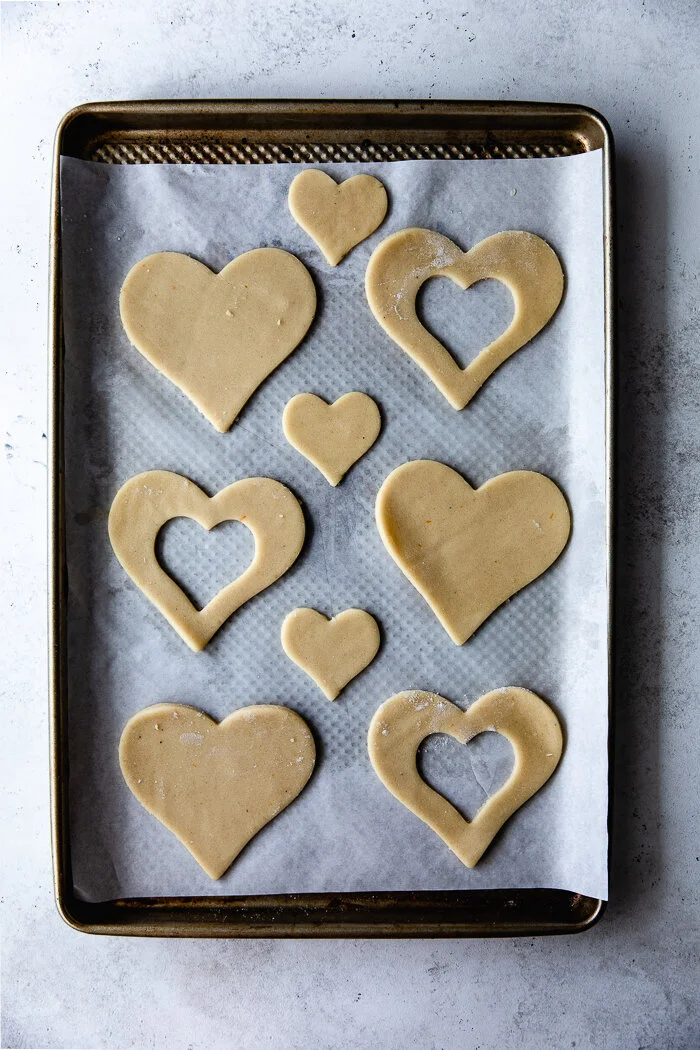
Preheat your oven in the meantime. After 15 to 20 minutes retire the tray from the freezer and separate your cookies. Arrange them in the baking sheet and bake immediately; 9 minutes for thinner and softer cookies and up to 11 minutes for thicker and crispier cookies. Bake thick cookies for just 10 minutes for a softer texture.
You can whip up your glaze while the cookies are cooling down. Then dip each cut cookie upside down into the glaze and then turn it and let it drip over a rack. Spread the Nutella on each of the whole cookies and end by sandwiching them! If using decorations, you need to sprinkle them after you glaze each cookie so the glaze is still a bit runny.
The cool thing about this recipe is that you can make the dough way in advance and keep it chill for about a week. You can store the scrapping as well (if not using at the moment) wrapped in a plastic paper. And of course you can leave the cookies frozen for months.
This one is so much fun to make with kids or with your friends! I’m dying over here to know how all these tricks work for you. Let me know if you make them!! And remember to take a pic and tag me in your Instagram post so I can see it and share your wonderful cookies with the world!!!
Happy cookie baking!


Nutella Heart Shaped Cookies
Ingredients
◯ Unbleached all-purpose flour – 2 ½ cups + 2 TBSP
◯ Almond flour — ½ cup (if not using almond flour just substitute to all- purpose for a total of 3 cups of flour and don’t add the additional 2 TBSP)
◯ Baking powder – 1 Tsp
◯ Fine sea salt – ½ Tsp
◯ Ground nutmeg (optional but very highly recommended) - ⅛ Tsp
◯ Butter, at room temperature but not too soft – 2 sticks, (16 TBSP)
◯ Raw sugar – 1 ¼ cup
◯ Finely ground orange (optional) – 2 Tsp
◯ Egg - 1
◯ Almond extract – 2 Tsp
◯ Vanilla extract - ½ Tsp
◯ About 1 cup of Nutella for filling the cookies
◯ Pink sugar pearls and crushed pistachios to decorate if desired. I used some dried rose petals to decorate but removed them before eating. They are completely edible but use only if you enjoy the bitter taste of tea leaves.
Details
Yield:
about 24 large (12 sandwiches) cookies plus some little ones
Total time:
1 hour to 1 hour and 15 minutes, including freezing and cool down
Active time:
10 minutes to make the dough + 5 minutes to roll and cut the cookie dough
Equipment:
stand mixer or electric hand mixer, parchment paper, cookie cutters, baking trays, cooling rack
Steps
To make the Nutella Heart Shaped Cookies: In a medium bowl mix the 2 ½ cups plus 2 tablespoons of flour, the ½ cup of almond flour (see how to’s above if not using almond flour) the teaspoon of baking powder, the ½ teaspoon of salt and the nutmeg with a hand whisk to break any large lumps.
In the bowl of a stand mixer with the paddle attachment put the 2 sticks of butter, the 1 ¼ cup of sugar and the 2 teaspoons of orange zest ( if using) and beat in medium speed (#4 on the Kitchen Aid) until the mixture looks fluffy and pale, about 5 minutes.
Add the egg, the 2 teaspoons of almond extract and the half teaspoon of vanilla, scraping the butter-sugar mixture down the bowl if necessary, and beat again for 2 minutes. Scrap down again if needed.
Decrease to low speed (#1 on the Kitchen Aid) and start incorporating the flour mixture, about half cup at a time (I like to use a measuring cup and add the flour through the opening of the mixer’s pouring shield.) Continue beating for 3 minutes. Stop the mixer and check dough’s texture. It should be a bit grainy to the touch but should hold together when you press it with your fingers.
Press the whole dough with your hands until uniform and divide it into two portions. Transfer one of the portions to a parchment paper and press it again until the dough is smooth and has a nice round shape. Place another parchment paper on top and press it down. With a rolling pin tap the dough to flatten it down, then start rolling from the center out until it is between ⅛” to ¼” thick, depending on your thickness preference.
Peel the top parchment paper and, if there’s any dough beyond the edges of your bottom parchment paper, cut it using a pizza cutter or sharp knife. Reserve the scraps. Transfer your parchment paper to a baking tray. Using your selected cookie cutters shape the dough, leaving as little space as possible between cookies. Cut small shapes on any left out area if desired. Place baking tray in the freezer for 15 to 20 minutes. You may repeat the process with the second disk. Combine its scrapes with the scrapes of the first disk. If you don't have enough space in your freezer for a second batch, just set it aside until you take out the previous tray.
In the meantime, preheat oven to 350°.
Take out your frozen tray and start peeling the excess dough around your shapes. For borders that are too thin or in the middle, just separate the shaped dough and arrange in the tray to have access to those areas. Reserve all excess of dough. Quickly arrange cookies, leaving about ½” of space between them.
Bake cookies for about 10 minutes, depending on the thickness of the cookie and your consistency preference. Mine were baked for 10 minutes. Take them out of the oven and let them in the baking tray, about 3 minutes. Using a thin spatula, carefully transfer each cookie to a cooling rack. Let them cool down completely before handling to prevent breakage.
After cooled down dip the cut cookies (tops) upside down on the hibiscus glaze (recipe below) and spread some Nutella over the whole cookies (bottoms). Decorate the cookies while the glaze is still runny.
To make the hibiscus glaze: Make a strong brew with hibiscus flowers or tea bags. Add first a tablespoon of the tea to your powered sugar. When you get your desired saturation, continue to add water until you achieve the desired consistency.
